Tuesday, November 30, 2010

CAKE

Cake!

I love cake.... And so do most people!

I know its been a few days since Thanksgiving, but after that freakishly long Roast Goose post I decided to wait a bit more before doing the cake post... Since it might also be very long... and I didn't want to flood people with too much cookery... and my brain needed to rest.....

But now I shall post about cake! Marvelous, marvelous CAKE.

Things you will need:

For the cake:
7 eggs, separated
1 cup sugar + 2/3 cup sugar (you'll see why later)
1 tsp cream of tartar
1/2 cup softened butter
1 cap-full of vanilla extract
zest from 1 lemon
1 1/2 tsp baking powder
1 cup flour
2 pinches of salt
1/3 cup milk

Other things you may want:
1 bag of fresh cranberries
1/3 or 1/4 cup brown sugar
1 cup of water
1 container of heavy whipping cream (I forget how they measure them... so if you're buying it at the store, get the short container of whipping cream... though you may need more... So, I guess you could always use a large one, and use the extra for eggnog or to put in cocoa or something. But I'm getting off topic, and I'm not really sure that was at all helpful. Sorry, I don't really measure when I cook. The most important thing is that you have enough whipped cream to cover the cake)
1 ripe pomegranate

So, I wanted something that looked festive, since it's that time of the year.

I decided on red and white, like Santa... or candy canes! That's why for the garnish I decided on cranberries and pomegranates. Their tartness can offset the whipped cream and enhance the flavor of the cake, which has the lemon zest in it.

What to do first? I made the cake in one day, so I will go through my process as I multi-tasked. First I will list the steps to avoid confusion:

1. Separating Eggs
2. Cranberries + Cake Prep
3. Back to Cake
4. Cranberries, Cream and Pomegranate
5. Cool Cake and Wait
6. Assembly

1. Separating Eggs

You will need:
7 eggs

Separating eggs is a lot easier than it looks, but it's very unforgiving if you mess up. Make sure that you don't get any of the yolk into the whites because they will not foam up otherwise.

Separating the eggs is easy. Crack the egg in half and then gently pour the yolk from one half to the other until the whites have slid away.

Another way you can do it is to crack the egg open and tip it out into your hand. If you open your fingers a little, the whites slide off, and your left holding the yolk. I prefer the second way since it lessens the chance of the yolk being broken by the eggshell.

Once the eggs are separated, set the whites aside and let them sit for about 30 minutes, or until they are room temperature. Cold egg whites take longer to whip up and also don't get as fluffy.

Set the yolks aside as well.

Remember to put both the whites and the yolks in big mixing bowls.

2. Cranberries + Cake Prep


You will need:
1 bag of cranberries
1 cup of water
1/3 cup brown sugar
Also:
1 cup flour
1 1/2 tsp baking powder
2 pinches salt

I always thought cranberry sauce was hard to make. To me, it was this mysterious concoction that came in a can and the fact that everyone seemed to get it in a can made it seem impossible to make.

Not so.

I was actually irked by how easy it was because for so long, I had thought it difficult.

So, take your cranberries and wash them, then drain them. 

Boil a cup of water and add in some brown sugar. I added two bars of brown sugar that we buy from the Chinese grocery store. It's actually very tasty and sometimes we eat it as candy :) All together it adds up to about 1/3 of a cup of sugar... perhaps less.

I didn't wan the cranberry sauce too sweet. I wanted it there for the tartness. You may add more sugar if you like, or less if you so choose.


Once the sugar has dissolved and the water is boiling, add your cranberries. They will soon begin to make a popping noise, and their skins will burst. Stir them frequently, until the berries disintegrate and everything is saucy. This doesn't really take long.
They're starting to pop!
It's pretty easy... O.o

Set this aside until your ready to use them later. Keep them in the pot.

To speed things along when you make the cake mix, sift the flour, baking powder and salt together in a bowl.

3. Back to Cake

For the meringue, you will need:

7 egg whites
1 cup sugar
1 tsp cream of tartar
For the batter, you will need:
7 egg yolks
2/3 cup sugar

1/2 cup softened butter
1 cap-full of vanilla extract
zest from 1 lemon
the flour/baking soda/salt that's been sifted
1/3 cup milk

Back to the cake!

By now, the whites should be room temp. If not, wait a little while longer.

Also, have a spatula handy to scrape the sides of the bowl if you need to. Preheat your oven at this point too. Set it to 350F.

Measure out about 1 cup of flour and mix in the cream of tartar with it. Have it set aside in a small bowl or measuring cup for easy pouring.

When making a meringue, it's easiest to make it with room temp. egg whites. If you add the sugar in the beginning it'll take a lot longer to fluff up. Add the sugar gradually after the whites have been whipped up and start being able to hold their shape.

Start whipping the whites at medium speed, or high speed. I don't really think it matters too much, since the main goal is to introduce air into the whites, to get them all fluffy. Without sugar, the whites look very foamy and a little transparent.
Egg whites sans sugar.

As they begin to froth up more and be able to hold their shape, gradually add in the sugar and cream of tartar. Adding the sugar like this helps it get incorporated and dissolve. The eggs are fluffy at this point, so adding the cream of tartar helps keep it like that. After you introduce the sugar, the consistency of the meringue changes and looks opaque.

Keep whipping the eggs until they are very stiff that they make tiny, stiff peaks. They'll also hold the impressions of the mixer and be thick enough that you can hold the bowl upside down (be careful when you do that, by the way). If you can still feel grains of sugar, keep mixing until they disappear.
They should look like this!

Now that your meringue is done, time for part two of the batter.

Add the butter and the remaining sugar to the yolks and whip them with the electric mixer until fluffy and light yellow in color. Add in the vanilla and the lemon zest, and mix a little more.
Gradually add in the flour and milk and mix until just incorporated.

 See, it turns lighter and a little fluffy.
Zest and vanilla added. 
Flour added. The less lumpy, the better.

Now for the delicate part. Fold the meringue into the batter. This is most easily done when you add the lighter batter to the heavier; in this case, add the meringue a spatula-full at a time to the yolk-batter. When you fold the meringue in, do it very gently, as to preserve the bubbles. Put the meringue on top, then gently cut it down vertically through both mixtures, down the bottom of the bowl and up the side. Turn the bowl each time you do this. Keep doing this until all the meringue is mixed with the batter and it has a pale yellow color.

I forgot to photograph the folding...  D:

Carefully pour this mixture into a bundt cake pan that has a removable center part. Make sure the pan in ungreased.

Pop your cake into the oven and bake for about 45mins to an hour. be very careful about checking the cake for done-ness, since it can deflate fairly quickly. Don't take peeks at it as it bakes!

4. Cranberries, Cream and Pomegranate

You will need:
The cranberries
The cream
The pomegranate

Back to the cranberries!

Take the pot with the cranberry sauce in it and add in about half a cup more of water and stir it into the sauce. Then, put it all in a blender and puree it. Strain this mixture, and set aside the pulp in a small bowl. We'll need it later.
It's a little steamy because I added hot water.

Return the strained sauce to the pot and boil until the volume is reduced by 1/3.

Take a large bowl (preferably metal and chilled) and pour in the heavy whipping cream. Whip it until firm. I didn't bother adding any sugar, since the cake is sweet enough. Cover this and set it in the fridge.

Take the pomegranate and wash it thoroughly. Score the sides, and carefully pry it open. I recommend wearing a black shirt while doing this, so even if you do get some pomegranate juice on you, it won't be that noticeable. Remove the seeds and set these aside as well.

5. Cool Cake and Wait

I also forgot to take pictures for this part, as well... I need to get better about that...

When the cake is done, take it out and set it upside down. Be very sure that the cake is cooked through, otherwise the middle will plop out and you will be sad. I know I was....

You can place it on a bottle top, through the middle-hole or you can just leave the oven open and set it on one of the racks. Let it cool for about an hour or two till it's room temperature to the touch.

When you're ready to remove the cake take a knife and gently run it around the outer edge of the pan. Remove the cake from the outer portion of the pan, and run the knife along the bottom and then around the middle. Gently tip upside down onto a plate.

6. Assembly

You will need:
Paper towels (a few of them damp, it helps a lot)
Cake decorating bags and icing tips
Brush (the silicone ones are pretty nice, the more I use them, the more I like them)
Cake-icing tool (or something very long and flat that you can even out the whipped cream)
Cranberry pulp
Cranberry sauce
Whipped cream
Pomegranates
Most of the stuff I listed is pictured here.

Clear away any crumbs on the plate that you have the cake on.

In a small pot, boil the cranberry pulp until bubbly. You can even add a little sugar to this, since it's going to be a glaze for the cake. Adding a little more sugar will make the pulpy mixture a little more thick, and help seal the cake better. You can also add a couple spoonfuls of jam, if you'd like.

Glazing the cake it a good idea because it helps seal in little crumbs so they don't come off while you decorate the cake and it also acts as a buffer to additional moisture, so your cake won't get too soggy.

Once the mix is bubbly, remove it from the heat and brush it onto the cake. It's easiest to do this when the mixture is still hot. You don't have to use all the mixture, but make sure that you didn't miss any spots.

Let this dry for about 10-15 minutes. Clean up the edges of the plate too!

From here, you can do your own thing and decorate it however you like. This is what I did:

I spread on a layer of the whipped cream over the cake. It helps to work from the top down; once you smooth out the top, work on the sides. After I was done spreading the whipped cream, I cleaned off the edges of the plate with a damp paper towel.

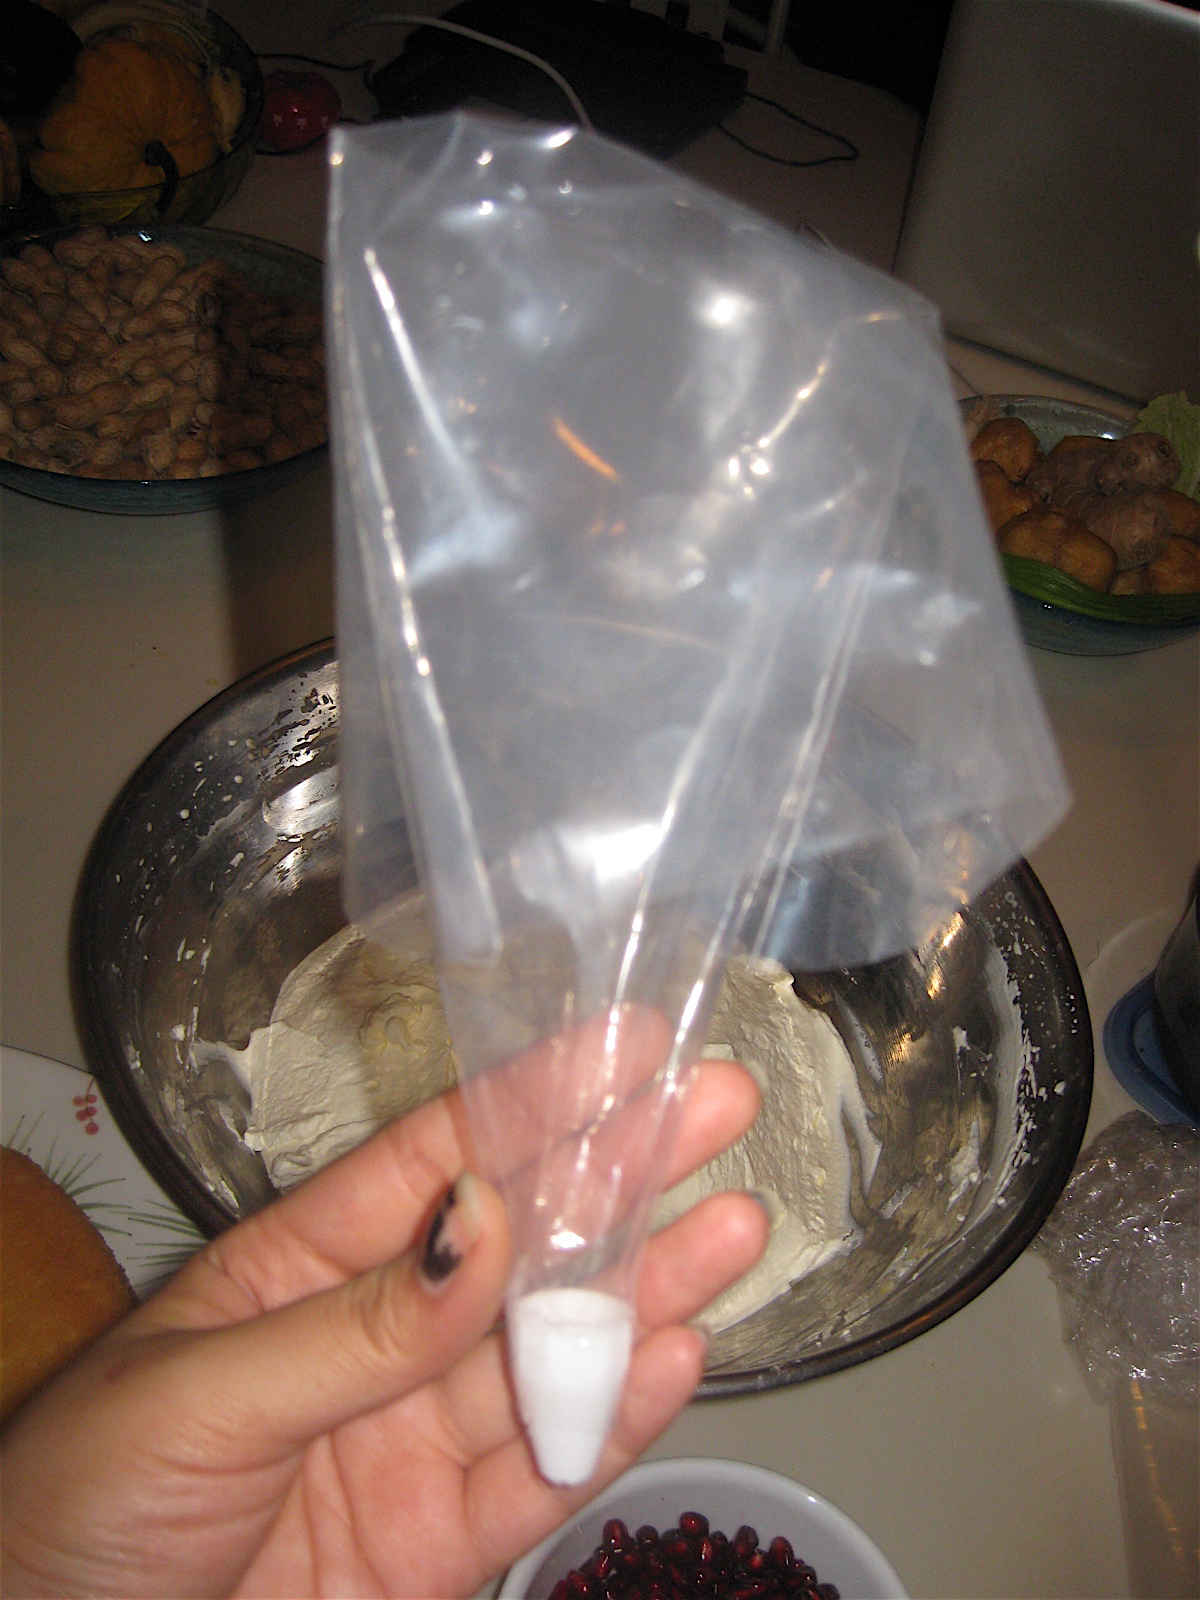
When using the decorating bags, it helps to fold part of it over your hand before you start filling it. This makes it easier to twist up and helps avoid any unnecessary mess. When decorating a cake, I like to try out the nibs before I start on the actual cake. A little practice before going onto the final is good

I spread the cranberry sauce onto the sides and used the pomegranate seeds on the top. When placing the seeds on top, I used a small spoon because dropping it on with my hands was just too unpredictable. You get a lot more control with a spoon. 

After you're done decorating, pop the cake in the fridge to let everything firm up. About 30-45 mins later it's ready to eat!

Enjoy!

Friday, November 26, 2010

Thanksgiving: Roast Goose

Oh, how I love the holidays... And one of the best things about the holidays is the food, of course!

 Our Goose this year! :D


For the past 3 years, I've made a Turducken for Thanksgiving. It was a hulking monstrosity of a boneless chicken stuffed in a boneless duck then stuffed in a boneless turkey and weighed about 35lbs. Of course, while at college we had a HUGE Thanksgiving potluck with everyone who stayed at school for the holiday; so with 30+ people, a Turducken was a good option.

THIS year, however, is the first Thanksgiving I'm at home in four years. It's just our little family group, so a Turducken is overkill, as is a whole turkey. After all, we're only feeding five.

So this year, I tackled a goose. I've never made a goose before, and Dad seemed pretty into the idea. We wanted to do it in the Cantonese style, filled with aromatic spices and with fiery red skin.

After looking online for a while, it seemed to prepare it in the traditional manner took a lot of prep work. Since the goose is a water bird it has a lot of fat. Steps are taken to help drain the fat from the fowl, but not so much that it's dry and tough.

The first thing we did was acquire a goose. Where to find a goose? WholeFoods, actually. It was a lot simpler to find a goose than I thought, since it's not commonly eaten in the US, but lo and behold, it was not. However, goose is a little pricey, so a duck would work equally well for this recipe. 

Now that we had to goose, a plan was set up:

1. Brine
2. Dry
3. Sewing and other stuff
4. Marinade and more sewing
5. Trussing
6. Blanching
7. Glazing and more drying
8. Cooking
9. Un-stitching
10. EATING

Okay... so, first thing's first:

Brine:

You Need (this is a super simple brine, to get fancier, add stock and/or herbs):
- A really big pot/bowl/container
- About a cup of salt
- Water (just enough to cover the bird)

I used a very large pot for this. Be careful when carrying it!

Soaking the bird in brine is a good idea to do the night before. In this case, it's 2 nights before.

Before going to bed, I prepared the bird to be soaked in brine.

When you unwrap the goose, there is a lot of fat in the back cavity of the bird. This is where their fat glands are located that the geese use to groom themselves and waterproof their feathers. while useful in life, not so useful for us. You can easily pull out these large chunks of fat, or cut them out if you so choose.

Also, remove the giblets and set them aside, or freeze them or cook them for a snack... we actually haven't done anything with them yet, so they're in the freezer.

Place the goose in the large pot/container and fill it with water about half way. Then, dissolve the salt in hot water. Since there is a lot of salt, add in the water and mix it around until part of it dissolves. Pour off the dissolved water, and repeat this process until all the salt has been dissolved. Doing this doesn't really take that long.

Once you've added the salt, add more water until the goose is fully covered by water. Swirl the water a bit, to make sure the salt it evenly incorporated into the water.

Cover and let sit in the fridge overnight.

The salty water will create a nice, juicy goose and help season the meat a little bit.

Oh, and why brine the bird, you may ask? It helps make the meat juicy and the salt soaks into the meat, which helps impart flavor into the goose.

Drying:

Drying the bird is important, since this is going to be roasted in the oven. If there's too much moisture it'll get soggy and the skin will be limp and less appealing.

So, the next morning, take the bird out of the brine (dump the brining water, you're not gonna need it). You can put the bird on your roasting rack, since it'll be suspended above the pan and the water can drip off the bird. If you put the rack at an angle, it'll help the water drain off more.

 Roast rack and pan. Very convenient!

Return the goose, rack, pan and all, to the fridge for a few more hours (um, I left it from 12 in the afternoon till the evening sometime... I can't rightly remember, since I took a nap before.. but it was drying for at least 4 hours) to let it drain and dry.

Drying....

Also, take this opportunity to remove any bits of feather left on the goose. It might sound/look gross, but sometimes the end bits of the feather get stuck in the skin. the easiest way to pluck these is with needle nose pliers. Tweezers are okay, but they don't have the grip that the pliers do. Since geese are fatty birds, the oil makes tweezers harder to use. Just make sure that you clean the pliers very well. With very hot water.

Sewing and other stuff:

Okay, so now that the goose is dry and feather-free, it's time to sew it up. Why sew? Because the marinade goes inside the goose! Therefore, sew it well.


Things you need:
- Large sewing needle
- Spool of thread. Any color is fine.
- Thimble

Here, I have a ridiculously large needle, used for embroidery thread or yarn, hence why it is so large. This is far easier to use than the trussing kits they sell at the grocery store, because it's easier to thread, you can control the length of the string more easily, since you have more on hand, and the needle is far sharper than a skewer. The thimble is also important. Again, since geese are greasy the thimble will help you grip the needle, even if your hands get oily.

When reading up on how to make the goose, it usually only called for sewing up the bottom cavity, since in Hong Kong and China birds are commonly served with the neck and head still attached. Well, seeing as we're in the US and birds are served neck-and-headless, we have to sew up two cavities.

 Before you do that, though, there are a couple things to take care of. First of all, the drier the bird, the easier this will be, so make sure you pat the bird as thoroughly as you can with paper towels.

The first thing you need to do is take a good looks at both openings of the bird, and assess if there is enough skin to cover each side when you sew it up. The neck-side opening was insufficient, due to the fact the neck stump stuck up out of the cavity a bit and also, the wish-bone was in the way.

You will need:
- A very sharp paring knife.
- Perhaps band-aids, just in case (I ended up needing one, so best be careful)
- Something to help prop the bird up (it'll help free up your hands, so you have more control when you do this. It's a lot harder if the bird is not vertical and stable)

You want a short, sharp blade for this. It's a lot easier to maneuver around the bone this way, so you can cut closer and leave more meat intact.

First, take out the wishbone, located at the very top of the sternum. It's pretty easy to remove. Take hold of the area between the neck and the wish-bone with one hand, so you have better stability. Run the knife along the edges of the bone, keeping as close it it as possible. It's kind of tracing all along the bone, in wide strokes to cut the meat from the bone. When the prongs are separated from the body, you can give it a bit of a twist and one or two small cuts and it pops right out.

 It looks weird... but this is part of the wishbone that I have my finger hooked around.

Secondly, I have to remove a bit of the neck. You want to be able to sew up the skin around it, so make sure that when you trim down the neck it comes below the top of the cavity. It's hard to find the edges of the vertebrae by feel, so just make and incision where you want to. Slowly and carefully cut around the flesh until the central bones and tendons are exposed. Cut the tendons and then carefully wedge the knife in between two vertebrae and make small slicing motions until it comes off. Make sure to be very careful about not cutting the skin.

It's easiest to do this when one hand holds the bird, and the other has the knife and makes as little contact with the skin and meat as possible. You want your knife-wielding hand to be more oil-free as to avoid slipping and perhaps accidentally cutting open your knuckle.... which happened. You have been cautioned.

This may seem weird, but now we separate the skin from the flesh. Traditionally, this is done by pumping air into the goose, via the neck, but since there is no neck you can either use your hands or a chopstick to separate the skin from the breast and back. Don't bother with the legs or wings.

Okay, so once that bit is done it's time to sew. Take the thread and measure out how much you will need plus 5 inches; now unspool about 8X that amount. Hold the sting by each end, and fold it over. Fold it again. Now run it under a few drops of water, so the threads stick together. Thread it through the needle and tie both ends together. You'll end up with a thick thread, that's just as good as trussing twine.

 The thread's been folded over a few times, so you can see how thick it's gotten.

Sew up the neck cavity very tightly.

After you do that, lightly poke the goose all over with the tip of the needle. Do it at an angle and very softly. You want to break the skin, but not poke deep enough to kit the meat. Doing this will allow more fat to drain from the skin, but leave the meat moist. 

Marinade and more sewing:

Now, it's time to make the marinade for the inside of the bird.

I never really measure when I cook, so adjust as you see fit.


You will need:
- 3 Spoonfuls of cooking oil
- 12 Chunks of ginger, pressed flat (this released more juice. press the ginger with the flat side of a large knife)
- 3-4 Green onions in 1 inch pieces
- 3-4 Cloves of garlic, diced
- 1 Spoonful of ground white pepper
- 1 Spoonful of five spice powder
- 2 Star anise, whole
- Soy sauce (about 1/4 cup, I think)
- Dark soy sauce (heavier and more robust than regular soy. Add about as much as the regular soy.)
- Chinese cooking wine (a little more than both soy sauces combined)
- Honey (a spoonful or two, depending on how sweet you like it)
- Salt (if it's not salty enough, and you don't want to add more liquid)

 In a small pot, heat the oil to the point of boiling. This should not take very long, so do not leave it unattended or else it will catch on fire.


Once it's hot, add in the ginger, green onions and garlic. Let them simmer for a little while, but don't let anything burn.

After a couple minutes, add in the white pepper, five spice powder and star anise for a few more minutes. It will start smelling really good.


Add in the rest of the ingredients at this point and turn the heat to medium. Have a tiny taste and see if you need to add more of this or that. Once it reaches a flavor you are satisfied with, turn off the heat and let it cool off for a while. Do not add it to the cavity when it's piping hot.


When it's cooled down enough you can touch with your hands and not feel pain, it's good to go.

Carefully pour it into the cavity of the bird. Use a spoon or measuring cup if necessary.

Now sew up the other end good and tight. Sew it twice if you need to. You don't want any marinade to escape.

 All sewed up and tied.
Trussing:

Before you start trussing, fill a large pot with water and start it boiling. You'll need this for blanching.

Tying the wing-tips

Trussing basically means tying up the bird in a secure way. I used kite string for this, because I don't like twine. Any strong, thick, cloth string will work for this. Securely tie the legs together and then the wing-tips. To keep the wings close to the body for easy handling and nicer presentation, take some string and tie it beneath the second wing joints (the elbow looking parts) and secure it to the part of the legs that you tied up. It should be nice and together at this point.


Blanching:

Blanching gets rid of impurities on the skin, make the skin tighter, firm up the shape of the bird and draws out some oil from the skin.


Once the large pot is boiling, grab the goose by the tied together legs, and slowly lower it into the boiling water. If the pot it big enough to put the goose in, you can submerge it for a few minutes (about 4 or 5), just make sure that the water doesn't over-flow because that will hurt a lot.


If you cannot put the goose the entire way in, dip it repeatedly and use a ladle to pour the boiling water over it. Be careful not to get burned.


Glazing and more drying:

After blanching it, pat it dry with paper towels.

And now for the glaze.

You will need:
- Honey
- Vinegar
- Soy sauce

The glaze is 4 parts honey, 1 part vinegar and 1 part soy sauce. Place all these in a pot and heat till syrupy. Stir constantly and make sure the heat isn't too high. If unattended, it will bubble over at an alarming rate.


When the glaze is done, brush it over the entire goose. Save the remaining glaze for the next day/when you cook it.

Place the goose somewhere to dry for at least 4 hours to overnight. Ideally, you'd hang it somewhere cool and dry, but if you don't have anywhere to hang a goose, place it on the roasting rack, where it's elevated. Leave somewhere cool to dry.

Cooking:

This is the easy part! Heat the oven to 450F. While you wait for it to heat up, brush the goose with another layer of the glaze and place it breast-side down in the roasting rack. Pour some water into the pan, so the drippings don't burn during cooking.

Ready for cooking. The dark splotches are from where the marinade leaked out.

Cook the goose at 450F for about 15 minutes, then reduce the heat to 340F. Turn the goose over. I did this by folding two sheets of paper towels over and using them as potholders (I made two of these, so 4 sheets of paper towels all together). DO NOT use a fork or something sharp to turn the bird, because it will pierce the skin and make it look messy... but most importantly, you want to keep the marinade INSIDE the goose. Sharp things are a no-no. The paper-towel-holder method worked well, and I didn't burn myself.

Each time you turn the goose, brush a layer of marinade on. Turn the goose every half hour for about 3 hours.

If there is not enough marinade, you can make more.

When the goose is nearing it's end, turn the oven up to 450F again (make sure it's breast-side down at this point). Cover it with a generous layer of glaze. Watch carefully that the skin doesn't burn.

When the skin is bubbly and a nice deep red-brown color, flip it breast-side up. Again, apply a generous dose of glaze and pop it back in the oven.


Monitor it closely, and once it's reached that nice caramelized-reddish color it's done!


Unstitching:

Once the goose is out of the oven, use some kitchen sheers to remove the stitching then drain the cavity.


Transfer the goose to a nice plate (with garnish if you so choose. I used shaved carrot and green onions)


Pour the drippings into a container (it makes a great marinade or sauce) and pour off all the fat. You can make a quick sauce by adding cornstarch and cooking it for a bit to thicken it, or you don't have to. Completely optional.


GOOSE IS DONE