A few days ago, I was struck by the strong desire to make French Onion Soup, completely from scratch. I wanted to make the beef broth and the caramelized onions myself; I think when things are homemade, they taste better.
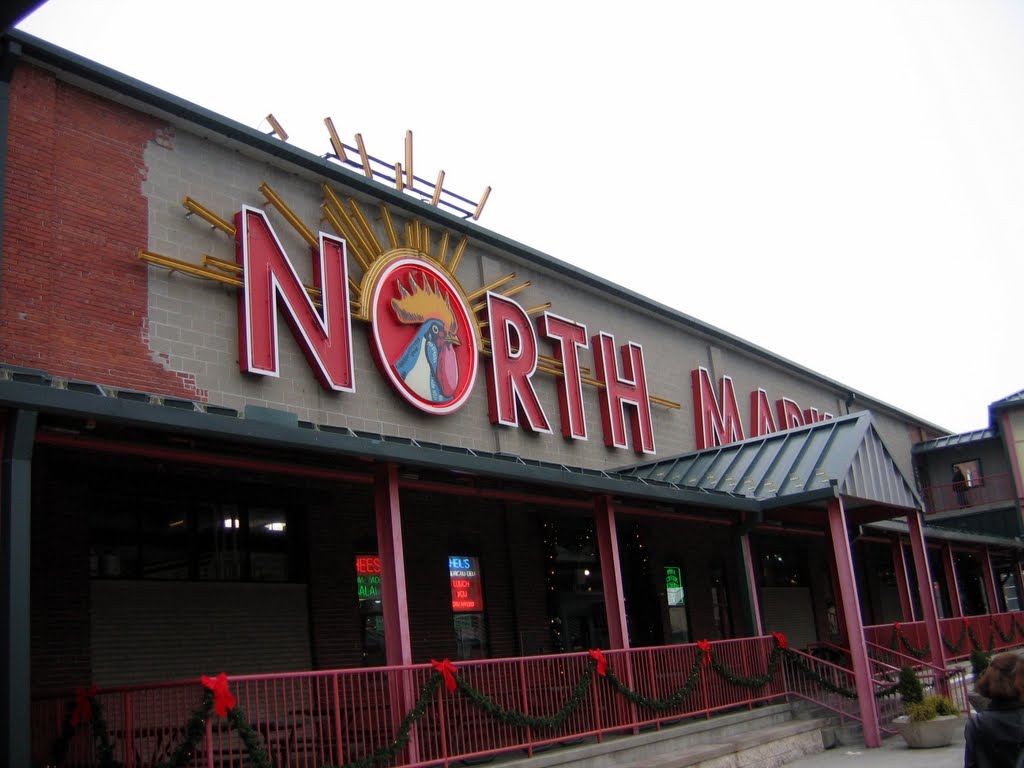
For ingredients, I decided to go to North Market, mostly because I knew I could get good quality Gruyere cheese and soup bones there. I also haven't been there in a while, so I thought I would make a post of it.
For those of you who live in Columbus, you probably know of North Market. It has various stalls that have prepared foods, fresh produce and meat and poultry. Many things there, you can't find at large chain stores and it's just good fun to go there, especially on weekends.

There were vendors outside selling produce! I love gourds! So cute ^_^
Usually, when I go to North Market, I hit up the same places: Jeni's Ice Cream (it's so good, it's ruined me for all other ice creams :p), Pure Imagination Chocolatier, Taste of India and Lac Viet Market... and few others...

Don't these pastries look divine? From Mozart's North Market Bakery.
But I was on a mission for ingredients, and that meant going to vendors I usually walk by or just take a passing glance at.
First off, I wanted Gruyere... mmm... Gruyere is very tasty, slightly nutty and creamy. No wonder people like to use this in French Onion Soup. For really good cheese, Curds & Whey is great. There's a great variety of cheese and the staff are friendly and have great advice about cheese pairings with wines and fruits.


I got a nice bit of Gruyere here, sliced and everything.
Next, I wanted beef bones to make a tasty broth. I wanted something with a good bit of marrow because I love the rich flavor it gives. I tried North Market Poultry and Game first, which has a tasty selection of poultry. I once picked up a really nice, fat chicken there one winter for Christmas dinner. They also have bison and rabbit there too! One day, I would like to try making rabbit stew, but that's a venture for another day...
Turns out, they didn't have the kind of bones I was looking for, but were nice and directed me to Bluescreek Farm meats where they had non-frozen soup bones. Before I made my way over, however, I looked at The Fish Guys because I love nice seafood. I was quite taken by the fish heads (I know, 'Eeew!'), the had salmon heads and a huge grouper head. Now, I know a lot of people are creeped out by fish heads, but they actually have a lot of meat and a good deal of omega 3 fatty acids, which are very good for us. Once you get past the fact it's a head, they make for really good eating. If you get them cut in half, you can bake them in the oven with a little salt and they taste great. I got one for my sister and they cut it for me too. It's such a hassle to try to do it at home, as I'm sure my Sophomore and Junior year roommates remember....

Mmmm... Fish!
On the way to getting beef bones, I stopped by North Market Spices to look at spices. I am such a sucker for spices. I love the way they displayed them, and they even had small jars that you can open up and sniff. Now, with spices like basil or thyme, I like growing them at home, but come winter, our fresh spices wil be out. I know I'll be visiting again, probably soon.... The staff are very nice and they have a great selection of exotic spices, perfect for any palette.

Impressive, no?
Omega Artisan Bakery was another stop I made. I needed bread, and was originally gonna purchase something a little cheaper from a grocery store bakery, but I've never gotten bread here and thought it would be a nice opportunity to try it. I picked up a French-style baguette because I wanted to compare it to the baguettes I had in Paris. French Bread in the US is definitely not like it is in France, and while I don't want to sound like a bread snob, it's hard not to... The bread at Omega was quite tasty, and the closest in taste and texture to real French bread. It had a nice crunchy crust that crackled and a soft, chewy inside that was airy and not sweet (thank god, too many breads in the US are too sweet). I stuffed my baguette into my grocery satchel and went about on my quest.

Look at all the tasty breads!
 Wonderfully airy insides of the Baguette.

At Bluescreek, I perused their selection of beef. It all looked very good, and they had a nice pile of soup bones. I got a few, and requested a couple have a nice bit of meat on them, which I would use later. The selection of meats was very nice and I think I will be back next time I make French Onion Soup because the beef broth came out so good.

Upon leaving, I saw some of the vendors outside ad picked up a little basketful of red potatoes. They looked really good, and I thought I'd roast them up in the oven. Mmmmm....
Here are more pitcures from my tasty adventure:

The Green Grocer!

Pastaria pastas... they are very good, but alas, for another day!

Home made sauces and fresh made pasta... plus Tiramisu. Omg...!

Olive oils of all sorts of flavors. Very good stuff.
So, all in all, a pretty worthy haul from shopping:

Now, onto the soup!
I'm pretty sure some soup purists would call my soup sub-par or not authentic, but when you cook at home, you make it your own. I know it's not going to be REAL French Onion Soup, but it came out pretty damn good, if I may say so myself.
The bottom line: Do what feels right in your own kitchen and make it how you like!
I'm making the beef broth and caramelized onions a day in advance. The onions always... ALWAYS seem to take longer than recipes tell you, especially if you're gonna be making a lot of them.
Caramelized Onions
To caramelize your onions you need:
~ Onions (I used a mix of purple onions and yellow ones. Some recipes say to only use purple ones, other tell you to never use them... So, I ended up using both. I don't think it makes a huge difference)

~ Olive oil/butter or both! I used a mix, half and half
~ A little water/white wine/dry sherry/broth to deglaze the pan if you need to. (Deglazing means that you add some liquid to get the brow bits at the bottom of the pan unstuck. Those bits have a ton of flavor)
~ Salt (Some recipes shun adding salt, others say it's a must.... so just do what feels right to you)
~ Sugar (optional; I didn't add any, but it can help the caramelization)
1. Chop up the onions lengthwise into slivers. Don't make them too thin, though!
2. Add some olive oil to the pan and some butter. I didn't give a measurement when listing the ingredients because it doesn't have to be very precise. Add enough butter/olive oil to lightly coat the onion slices. For about 8 onions, I used 2 tablespoons olive oil and 3 table spoons butter. I love the smell of cooking butter.
3. Heat oil and butter until the top is shimmery. Add the onions, stirring well so that all the pieces are lightly covered in buttery goodness.
4. Now comes the long part... Make sure you have your pan on medium heat. Place a cap on top of the pan, but make sure it's offset, so that the steam can escape. I like doing it this way so the heat circulates and helps cook the onions faster, but the moisture can escape, which means better caramelization. Stir this every.... 7-10 minutes... that should be good.
5. As they continue cooking, you should stir them fairly often, to prevent burning and also to make sure that the onions all get equal amounts of pan-time.
6. The onions will eventually begin to cook down. When this happens, soon, they will begin to turn a little golden in color. Continue stirring often. If you are opting to add sugar to help with caramelizing, this is the time. That, and salt.

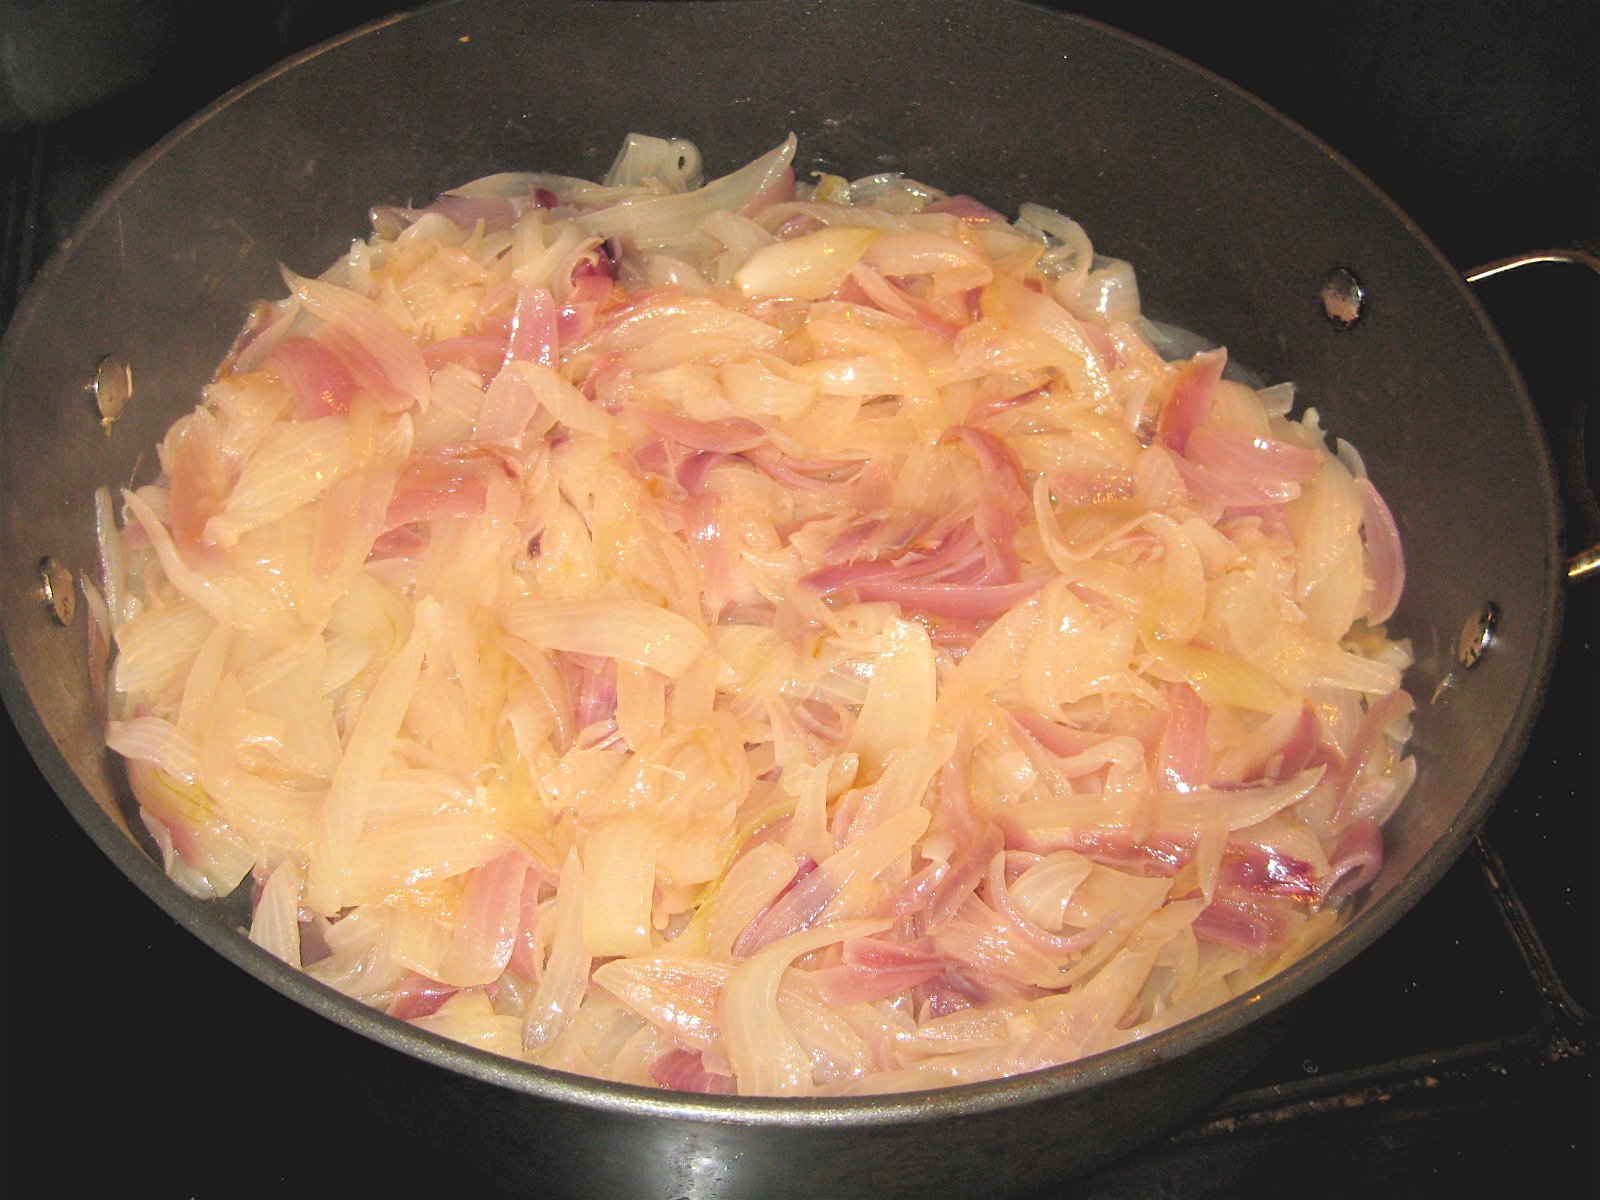


7. When they start browning, be careful, because the line between caramelization and burning is a fine one. It's okay if they stick to the pan a little, that gives it flavor. Just make sure you don't let it sit stuck for too long, and when you do unstick them, make sure to loosen the stuck bits too. At this stage to you can deglaze a little bit, by adding tiny bits of broth/wine/water to the onions. Just a little, though.
8. Once your onions take on a rich, dark brown, they are complete! Let them cool a little before putting them in a container. If you leave them over-night, the flavor greatly improves, which is why it's good to make these in advance.

Beef Broth:
Beef bones/ knuckles/ Beef anything, really
A lot of water... measure out how many cups of water you're gonna use in your recipe, then add an additional 5-6 cups. This way you'll have extra even though it will boil down quite a bit.
A really big pot
Salt (optional)

I just made a really simple beef broth for the French Onion Soup. Beef is the prefered broth, but you can use chicken, pork or vegetable if you prefer. I like it with beef, personally.
I'm not really gonna give step by step instructions for the broth, because it's so simple. Just remember to:
1. Heat it up to a boil, then turn the temperature down to Low or Medium Low.
2. Stir occasionally.
3. Skim the surface from time to time to help get rid of boiled residue and fat.

Never skimmed... this is the kinda stuff you need to get rid of in order to have a nice broth.

There are bubbles, and a little fat on the top. Skim off as much as you can.
I boiled mine for about.... 5-6 hours, perhaps a little longer.
When the meat was falling off the bone, I fished the bones out and pulled the meat off. At this point, it's really easy to do, so you can just use a fork to get the meat. I'm gonna use this meat with the little read potatoes I bought.


Return the bones to the pot and continue cooking on low. When it's reached a flavor you deem worthy, turn off the heat and let it cool then skim the surface one more time, to rid it of excess fat.

Finished broth!
Oven Roasted Red Potatoes
Ingredients:
Small red potatoes, about 17 or 18, cut in bite sized pieces
1 package button mushrooms, diced
Beef from the beef bones, also chopped
Garlic, about 3 cloves minced
Rosemary (fresh is best! About one sprig)
Olive Oil
Salt and pepper to taste


Glaze:
1/2 spoon of brown sugar or honey
1 tbsp of butter
2 tbsp olive oil
Salt
Garlic powder
Pepper
Preheat the oven to 375F.
1. Chop up the potatoes, mushrooms and beef into bite sized pieces.

2. Mince up the garlic and rosemary and mix them in a little bowl with the olive oil, salt and pepper.
3. Add the olive oil mix to the chopped potatoes and stuff. Toss them all together so pieces are evenly coated.

4. Put it into a oven safe bowl/container/thingy and cover it with foil so it wont dry out.

5. Bake for about 40ish mins, then remove the foil. In a small bowl mix up the glaze.
6. After about 10 mins, generously brush the glaze onto the top of the potatoes.
7. Keep baking until the potatoes are nicely browned and sizzle a little around the edges.
8. Remove and wait about 5 mins before eating. It'll be really HOT!
...I forgot to snap a picture of the final product... but it looked great and tasted really good!
French Onion Soup!!! OMG Nom Nom Nom....
I loooooove French Onion Soup.... so after all that preperation, here it is!!!
Ingredients:
Caramelized onions... about 8 onions worth
8 cups of beef broth, plus 2 more on reserve
A few sprigs of thyme, tied together with a string
1 Bay leaf
Salt and pepper to taste
A few shakes Worcestershire sauce (I thought it'd be weird, but it makes a big difference! Some people also use Balsamic Vinegar)
A little more than 1/2 cup of white wine
A few slices toasted French bread (depending on how you're serving it, the number of slices will vary)
Gruyere cheese, sliced or grated, enough to cover the surface of your individual bowls, or one large serving (I made mine in a large bowl, for communal dining. Less to wash!)
About a handful of grated Parmesan (it adds a little oomph!)
0. Before you do anything, toast the bread! Put a little foil down on a baking sheet and place your bread there in however many slices you need.


1. Okay, so get a large pot and dump in the caramelized onions. If you made them in advance, let them heat up a bit in the pan, but don't let them burn. Add in a little broth, enough to just cover the onions, and bring it to a simmer, then add about 8 cups of broth.


2. Add in the thyme and bay leaf. It's worth it to tie up the thyme, so it's easier to fish out later. You wan the flavor, not the leaves.
3. Once everything is simmering, cover the pot and let it cook for 30-40 minutes on low, or medium low.

5. At this point, I like to ladle out some of the soup into a little bowl and season it, just to see how it tastes.
This way, you can experiment without touching the main supply, just in case you mess up. Put in a drop or two of the Worcestershire sauce and a little bit of white wine, to see of you like it. If you do, add these two ingredients into the soup, starting with very little, and working your way up from there.
I'd reccomend adding the Worcestershire sauce via spoon instead of shaking it directly from the bottle, because sometimes you get too much. It's a strong taste, so a little goes a long way. As for the wine, to better control the portions, I like to put it in a measuring cup for easier and more controlled pouring.
If you don't like the way it tastes, that fine too :) Some people like it without. Or some people put in sherry instead. In the end, it's really up to you!

6. Place the oven rack to the lowest, or second lowest placement in the the oven. Set your broiler to 380F. Put your soup in its serving container. Here, I used a large ceramic pot and made one large serving. Add the soup, then place the toasted bread atop it.

The finishing touches!


7. Generously spread the Gruyere on top of the bread and sprinkle the Parmesean evenly on top of that. Now, pop it into the oven and bake it for about 10-15 mins or until the cheese is golden brown a deliciously gooey!!!

8. Remove the soup from the oven and let it sit for at least 7 minutes, so you don't burn yourself.
9. EAT!!!

I hope you enjoy these recipes, becuase I do!